Error Code 0x80246017 is a Windows Update error that indicates an issue with the Windows Update service, preventing it from downloading and installing updates correctly.
The Windows Update Error Code 0x80246017 error message may read: “There were problems installing some updates, but we’ll try again later.
The Windows Update Error Code 0x80246017 can be caused by several reasons such as network connection issues corrupted system files, or incorrect update settings.

To fix this Windows Update Error Code 0x80246017, there are several solutions that you can try
Run the Windows Update trouble-shooter to fix Windows 10/11 Update Error Code 0x80246017
Going to Settings > Update & Security > Troubleshoot
Clicking on “Additional trouble-shooters”, Selecting “Windows Update“, and clicking on “Run the trouble-shooter”.
System File Checker (SFC) Scan to fix Error Code 0x80246017
The System File Checker (SFC) is a built-in tool in Windows that helps scan and repair corrupted system files. Here are the steps to run an SFC scan to fix windows 10/11 update Error Code 0x80246017:
- Open the Command Prompt as an administrator. You can do this by typing “cmd” in the Windows search bar, right-clicking on “Command Prompt,” and selecting “Run as administrator.”
- In the Command Prompt window, type “sfc /scannow” and press Enter. This command will start the scan.
- The scan may take some time to complete. Wait for it to finish. Do not close the Command Prompt window or interrupt the process.
- Once the scan is complete, you will see a message indicating whether any corrupted files were found and repaired.
- If the SFC scan detects any corrupted files, it will automatically replace them with a cached copy that is in a compressed folder at %WinDir%\System32\dllcache.
- If the scan is unable to repair the corrupted files, you may need to use other tools like DISM (Deployment Image Servicing and Management) to restore the files or perform a repair installation of Windows.

When the scan is finished, you can close the Command Prompt window.
DISM Scan steps
Assuming you are referring to “DISM” (Deployment Image Servicing and Management) steps for Windows operating system, here are the basic steps:
- Open Command Prompt as an Administrator: To run DISM, you need to open Command Prompt as an administrator.
- You can do this by pressing the Windows key + X on your keyboard and selecting “Command Prompt (Admin)” from the menu that appears.
- Check the health of the system image: Run the following command to check the health of the system image: DISM /Online /Cleanup-Image /CheckHealth
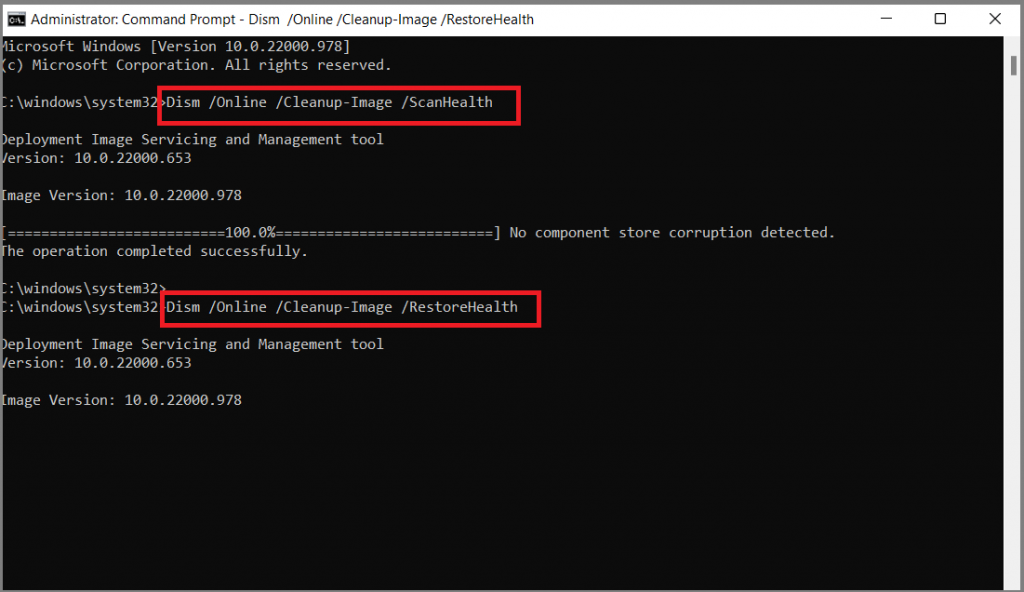
- Scan the system image for any corruption: Run the following command to scan the system image for any corruption: DISM /Online /Cleanup-Image /ScanHealth
- Repair the system image: If the scan finds any corruption, you can try repairing the system image by running the following command: DISM /Online /Cleanup-Image /RestoreHealth
- This command may require an internet connection to download necessary files.
- Check for Windows Update issues: You can also use DISM to check for Windows Update issues by running the following command: DISM /Online /Cleanup-Image /CheckHealth /RestoreHealth /ScanHealth /CheckSur
- This command will check for any issues with Windows Update and attempt to fix them.
- Restart your computer: Once you have completed the DISM steps, restart your computer to apply any changes.
Note: The steps may vary depending on the version of Windows and the specific issue you are trying to resolve. It is important to research and understand the proper usage of DISM before attempting to use it.
Restart the Windows Update service to fix Error 0x80246017
- Opening the Run dialog box
- Using the Windows key + R shortcut
- Type in “services.msc”,
- Locating the Windows Update service,
- Select “Restart” Option from the context menu.
Another solution to fix this Windows 10/11 Update Error 0x80246017 is to temporarily disable any third-party antivirus or firewall software installed on your computer and trying to install the updates again to see if the Windows Update Error Code 0x80246017 disappears.
- Open the Windows Start menu and click on to “Control Panel.”
- Click on “Programs and Features” or “Add/Remove Programs” relying on your Windows version.
- Select the application you desire to disable and click on “Uninstall” or “Change/Remove.”
- Follow the prompts to entire the uninstallation process.
- If you are triggered to restart your computer, do so.
- Alternatively, you can disable third-party software program via the use of the Task Manager:
- Press Ctrl+Shift+Esc to open the Task Manager.
- Click on the “Startup” tab.
- Select the software you prefer to disable and click on “Disable.”
- Close the Task Manager.
- Keep in thinking that some third-party software program may additionally be indispensable for your pc to feature properly.
- Make certain you recognize the penalties of disabling any software earlier than doing so.
You can also reset the Windows Update components by following procedure.
- Opening the Command Prompt (Admin)
- Use the Windows key + X shortcut,
- Type several commands to stop.
- Restart the Windows Update components.
- Renaming the SoftwareDistribution and Catroot2 folders.
Finally, you can check your network connection by ensuring that your computer is connected to a stable network, resetting your router or modem, and disabling any VPN or proxy connections before trying to install the updates again.
If none of these solutions work, you can contact Microsoft support for further assistance.